
Converting Scene Files
It Describes the function to convert a serial image of an upload file into a single file.
s# What is a scene file?
A scene file is a unit that refers to a batch of consecutive images.
-
In a Single Image type project, each image file has the same hierarchy.
And it is not an actual physical file, but a virtual file provided by AIMMO Enterprise for your work convenience. -
This function is available when the project task type is created as
a sequence imagewhen creating a project.
What is the difference between a scene file and
a frame?
- A frame is the unit of each image that makes up a scene file which means a frame is an image.
Which project types support the scene file conversion function?
When creating a project, if you select Sequence Image, you can use the conversion function.
- The type that enables the Object Tracking function at an image resource file.
- A project in which tasks are implemented in batches of serial images.
What is the difference from the Single Image type?
1. Add stages for making up the scene file
Simply uploading data is not complete, it is necessary to convert the uploaded data into a scene file. (Conversion from scene file management)
- It means that, in one project,
- before converting the scene file: each folder can only be checked on
the file managementand scene file management` screens - after converting the scene file: it can be checked in the datasets.
- before converting the scene file: each folder can only be checked on
2. The difference in units of task standards
The minimum unit for managing tasks is "Scene File".
- Task assignment, rejection, QFV check, etc.
The list of files of the existing Single Frame type is the same as the list of the scene files.
3. GT Scene File Structure and Upload
GT Scene File Structure
Frame GT: Save the scene file & frame information.
-
Track ID info (number, class, attribute, etc.)
-
Track the ID of the instance in each frame, location, etc.
GT Upload
-
Only files converted to scene files are available for GT upload.
-
If no scene file matches the last path name based on the path, a pop-up with instructions for the upload failure will be displayed.
- Failure message:
"Scene file cannot be found"
- Failure message:
-
Keep failure cases such as class errors, attribute errors, etc. the same as the Single Image type.
Managing Scene Files
This is a page where you can manage scene files separately from the file management page, and it is a screen that converts scene files for sequence tasks based on the folder at the lowest depth of the uploaded data.
- After converting the scene file, the lowest Depth folder becomes the scene file.
- It provides a list of all folders that can be checked in folder management.
- Automatic scene-file configuration is not supported, and users should manually run the scene-file conversion themselves.
- Replace the lowest depth folder in the uploaded file structure with the scene file, and the image files contained in the folder with frames.
- However, files in the root folder are not converted to scene files.
Synchronization of Scene Files
When converting a scene file for the first time, the image file contained in the lowest Depth folder is configured as a scene file.
Files of type (extension) that cannot be composed as frames are automatically excluded from the scene file.
- After converting the scene file,
in folder management, delete or add images in the folder of the scene file and they are automatically synchronized.- When you delete a folder, the scene file will be deleted as well.
- After the labeling task begins, it cannot be synchronized.
Delete a scene file
When deleting a folder in file management,
synchronization occurs (same as the original deletion concept/single image).
- Scene file management, datasets are deleted.
When modifying files in a folder in File Management,
scene file management and dataset synchronization proceed.
- Before starting the task: It is available to add, delete, and replace files.
- After starting the task: The replacement file is available to be overwritten only (same file name), and files are not available to be added or deleted.
When replaced after starting work, the existing created instance/history/passing or non-passing / task stages of the replaced frame remain the same.
The scene file conversion process
Step 1. On the scene file management screen, execute file upload.
Before uploading files, you must arrange the folder hierarchy before executing the upload.
- After uploading a file, if you change the folder hierarchy system, the frame count could be exposed as 0 when you use the studio function.
- Uploads can be done in the form provided by file uploads (Folder, N Cloud, Azure Upload, GT Upload).
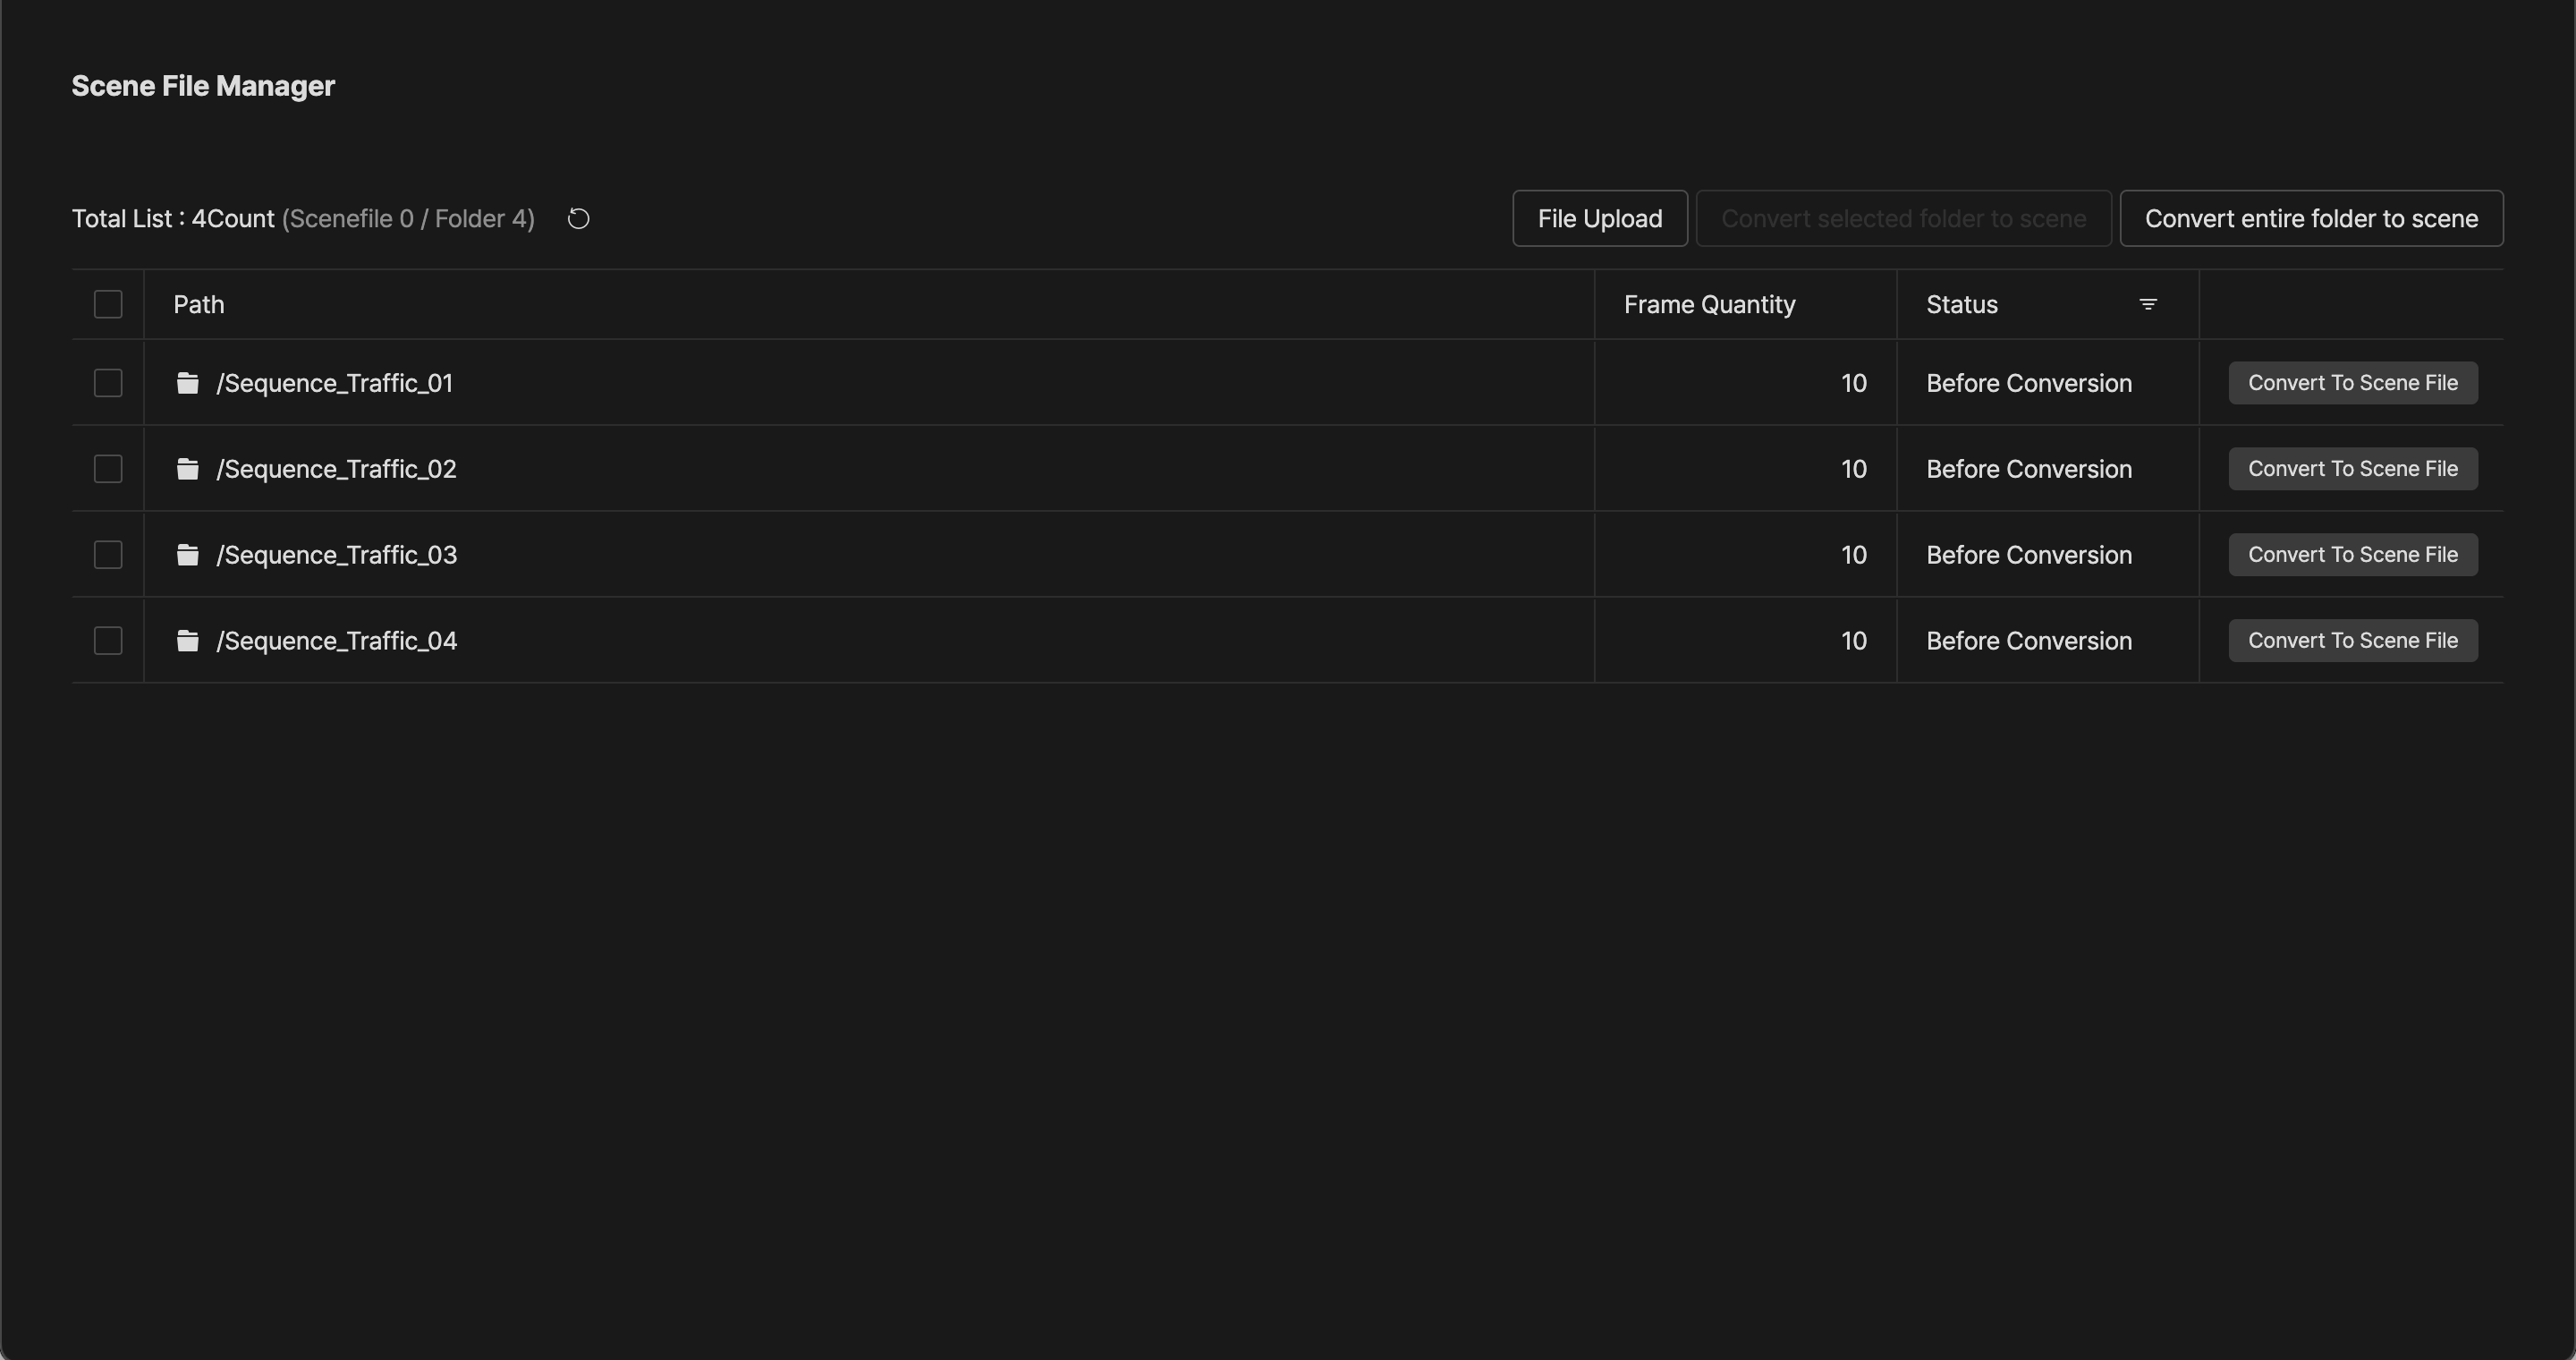
The scene file management screen
Step 2. Select the uploaded file to convert it to a scene file.
- Scene file conversion provides two functions: folder selection and entire folder conversion.
- Scene file conversion is executed using the
‘Convert Scene’button on the right side of the list.
Step 3. After converting the scene file, complete the scene file management and synchronization to the dataset.
- The converted scene file lists are synchronized when it moves to the dataset screen.
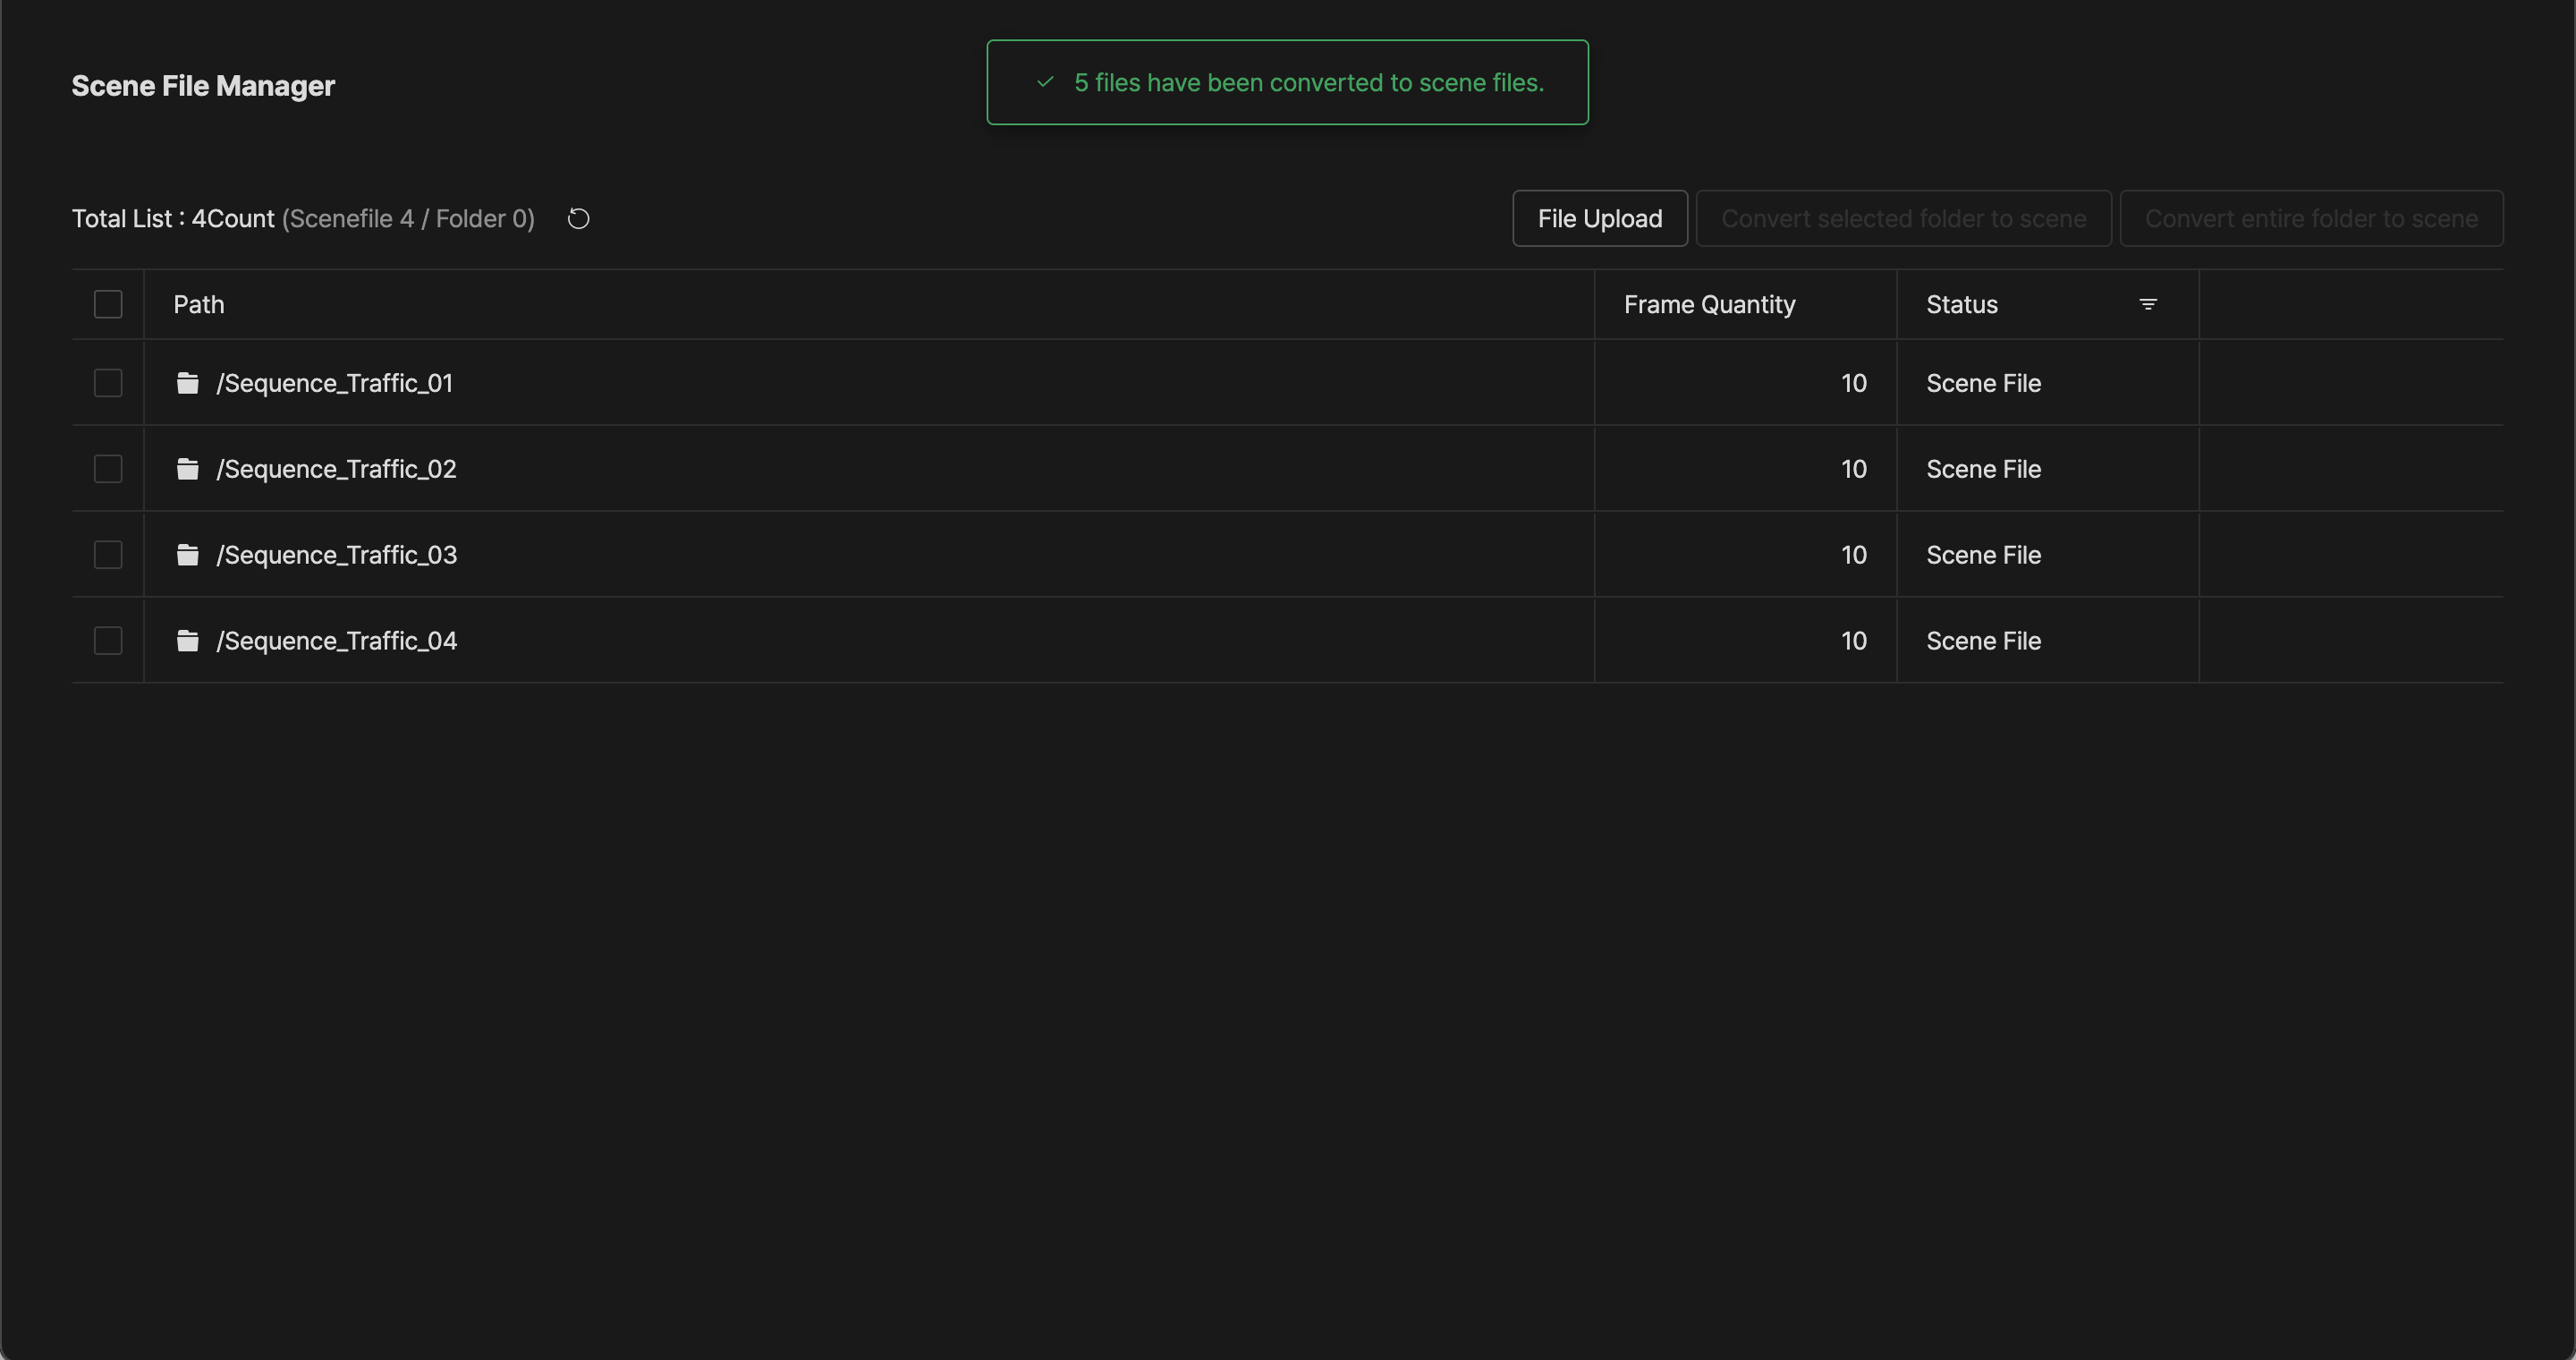
Scene file conversion completion screen
If you have any other inquiries, please get in touch with us at help@aimmo.ai
Updated 10 months ago